MySQL Database Developer
CRUD Operations
VB.NET WinForms - Full Guide
Introduction
To use MySQL with VB.NET WinForms for CRUD operations (Create, Read, Update, Delete), you'll connect a VB.NET Windows Forms app to a MySQL database and execute SQL queries to manage data. 🛠️ This guide builds a simple Product Management System to manage products inside a MySQL database!
Prerequisites 📚
- ✅ Visual Studio 2022 'VS2022' (Community Edition is free)
- ✅ MySQL Server (local or remote)
- ✅ MySQL Connector for .NET8
- ✅ Basic knowledge of VB.NET, WinForms, and SQL queries
🔽 Download and Install MySQL Server
Before you can connect your VB.NET application to MySQL, you need a MySQL server installed on your computer (or access to a remote server).
Here’s how you can install it step-by-step:
⚙️ Step 1: Download MySQL Installer
- Go to the official MySQL download page: 👉 https://dev.mysql.com/downloads/installer/
- Choose the "Windows (x86, 32-bit), MSI Installer".
- Click Download (you can skip the account sign-up by choosing "No thanks, just start my download").
⚙️ Step 2: Install MySQL Server
- Run the downloaded installer.
- Choose "Full" when asked for setup type (this will Installs all of the products available in this catalog including MySQL Server, MySQL Shell, MySQL Router, MySQL Workbench, documentation, samples and examples and more.).
Follow the steps to install:
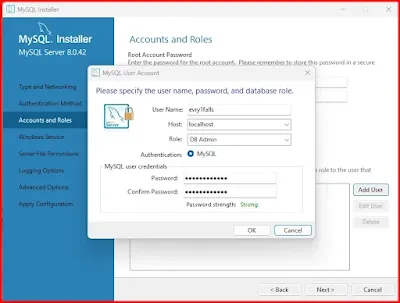
- Set a root password when prompted (you’ll use this later in your connection string).
- Optionally create a user account.
- Choose the default port 3306 unless you have a specific reason to change it.
⁉️What if you found out that port 3306 is in use by another program?!
Option 1: Find what's using port 3306
Open Command Prompt as an admin (search for "cmd," right-click, and choose "Run as administrator"). Type this command and press Enter:netstat -ano | findstr :3306 tasklist | findstr <PID> Option 2: Change MySQL’s Port
When installing MySQL, you can choose a different port, like 3307 or anything else that's free.Just remember to update your connection settings in Visual Basic, MySQL Workbench, or any other applications you're using so they connect to the right port.
⚙️ Step 3: Verify Installation
- After installation, open MySQL Workbench (installed with the Developer Default option).
- Connect to your local server using:
- Hostname: localhost
- Port: 3306
- Username: root
- Password: the one you set during setup.
- If you can connect successfully, your MySQL server is ready!
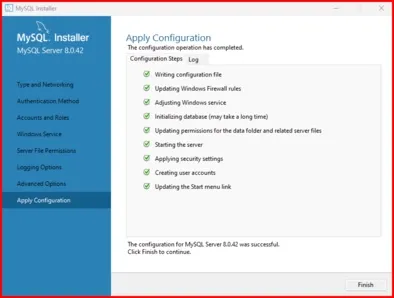
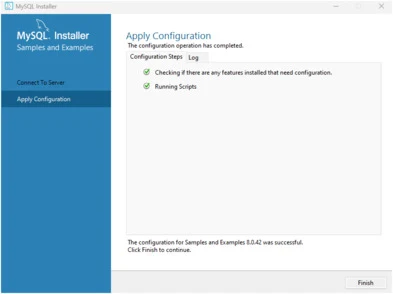
- MySQL Server has finished configuring Database root password
📦 Additional Tips
- If MySQL Workbench feels too heavy, you can use phpMyAdmin or simply the MySQL Command Line Client for basic operations.
- Always remember your root password — it’s critical for database management and connection from your VB.NET app.
- For lightweight development, you can use portable versions like WAMPP which include MySQL with easier configuration and I wrote a post about WAMP Installation on Microsoft Windows
Step 1: Set Up the MySQL Database 🛢️
Create a Database
Open MySQL Workbench or Command Line, then run:
CREATE DATABASE ProductDB;
Create a Table
USE ProductDB;

CREATE TABLE Products (
    ProductID INT AUTO_INCREMENT PRIMARY KEY,
    Name VARCHAR(100),
    Price DECIMAL(10,2),
    Stock INT
);
Insert Sample Data (Optional)
INSERT INTO Products (Name, Price, Stock) VALUES ('Laptop', 999.99, 10);
INSERT INTO Products (Name, Price, Stock) VALUES ('Mouse', 19.99, 50);
Step 2: Create a VB.NET WinForms Project 🖥️
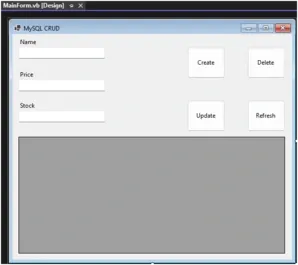
- Open Visual Studio 'I will use 2022'➡️ Create "Windows Forms App (.NET Framework 'I will use .NET8')" ➡️ Name it MySQL CRUD.
- Add controls:
- DataGridView dataGridView1
- TextBoxes: txtName, txtPrice, txtStock
- Buttons: btnCreate, btnUpdate, btnDelete, btnRefresh
Step 3: Install MySQL Connector via NuGet 📦
- Right-click project ➡️ Manage NuGet Packages ➡️ Install
MySql.Data.
Step 4: Connect to the Database 🔗
Import MySQL Library
Imports MySql.Data.MySqlClient
Define Connection String
Private connectionString As String = "Server=localhost;Database=ProductDB;User Id=root;Password=yourpassword;"
Step 5: Implement CRUD Operations ✏️
Read (Display Products)
Private Sub LoadProducts()
    Using connection As New MySqlConnection(connectionString)
        Dim query As String = "SELECT * FROM Products"
        Dim adapter As New MySqlDataAdapter(query, connection)
        Dim dataTable As New DataTable()
        adapter.Fill(dataTable)
        dataGridView1.DataSource = dataTable
    End Using
End Sub

Private Sub MainForm_Load(sender As Object, e As EventArgs) Handles MyBase.Load
    LoadProducts()
End Sub

Private Sub btnRefresh_Click(sender As Object, e As EventArgs) Handles btnRefresh.Click
    LoadProducts()
End Sub
Create (Add New Product)
Private Sub btnCreate_Click(sender As Object, e As EventArgs) Handles btnCreate.Click
    Using connection As New MySqlConnection(connectionString)
        Dim query As String = "INSERT INTO Products (Name, Price, Stock) VALUES (@Name, @Price, @Stock)"
        Using command As New MySqlCommand(query, connection)
            command.Parameters.AddWithValue("@Name", txtName.Text)
            command.Parameters.AddWithValue("@Price", Decimal.Parse(txtPrice.Text))
            command.Parameters.AddWithValue("@Stock", Integer.Parse(txtStock.Text))
            connection.Open()
            command.ExecuteNonQuery()
        End Using
    End Using
    LoadProducts()
End Sub
Update (Edit Existing Product)
Private Sub btnUpdate_Click(sender As Object, e As EventArgs) Handles btnUpdate.Click
    If dataGridView1.SelectedRows.Count > 0 Then
        Dim productId As Integer = Convert.ToInt32(dataGridView1.SelectedRows(0).Cells("ProductID").Value)
        Using connection As New MySqlConnection(connectionString)
            Dim query As String = "UPDATE Products SET Name=@Name, Price=@Price, Stock=@Stock WHERE ProductID=@ProductID"
            Using command As New MySqlCommand(query, connection)
                command.Parameters.AddWithValue("@Name", txtName.Text)
                command.Parameters.AddWithValue("@Price", Decimal.Parse(txtPrice.Text))
                command.Parameters.AddWithValue("@Stock", Integer.Parse(txtStock.Text))
                command.Parameters.AddWithValue("@ProductID", productId)
                connection.Open()
                command.ExecuteNonQuery()
            End Using
        End Using
        LoadProducts()
    Else
        MessageBox.Show("Please select a product to update.")
    End If
End Sub
Helper: Load Selected Row into TextBoxes
Private Sub dataGridView1_SelectionChanged(sender As Object, e As EventArgs) Handles dataGridView1.SelectionChanged
    If dataGridView1.SelectedRows.Count > 0 Then
        txtName.Text = dataGridView1.SelectedRows(0).Cells("Name").Value.ToString()
        txtPrice.Text = dataGridView1.SelectedRows(0).Cells("Price").Value.ToString()
        txtStock.Text = dataGridView1.SelectedRows(0).Cells("Stock").Value.ToString()
    End If
End Sub
Delete (Remove Product)
Private Sub btnDelete_Click(sender As Object, e As EventArgs) Handles btnDelete.Click
    If dataGridView1.SelectedRows.Count > 0 Then
        Dim productId As Integer = Convert.ToInt32(dataGridView1.SelectedRows(0).Cells("ProductID").Value)
        Using connection As New MySqlConnection(connectionString)
            Dim query As String = "DELETE FROM Products WHERE ProductID=@ProductID"
            Using command As New MySqlCommand(query, connection)
                command.Parameters.AddWithValue("@ProductID", productId)
                connection.Open()
                command.ExecuteNonQuery()
            End Using
        End Using
        LoadProducts()
    Else
        MessageBox.Show("Please select a product to delete.")
    End If
End Sub
Step 6: Best Practices and Error Handling 🧠
- ✅ Use
Usingblocks for resource management - ✅ Always use parameterized queries
- ✅ Wrap database operations with Try-Catch for error handling:
Try
    ' Your database code here
Catch ex As Exception
    MessageBox.Show("Error: " & ex.Message)
End Try
- ✅ Validate user inputs before database actions
Step 7: Test the Application 🎯
- Add products ➡️ Refresh ➡️ Edit ➡️ Delete ➡️ Confirm all functionalities
Optional Enhancements ✨
- 🔎 Add a Search Feature
- 🔒 Input Validation (use NumericUpDown)
- ⚠️ Confirmation Dialog before Delete
If MessageBox.Show("Are you sure?", "Confirm", MessageBoxButtons.YesNo) = DialogResult.Yes Then
    ' Delete code here
End If
Summary ✅
Now you know how to:
- ➕ Create products
- 📋 Read products
- ✏️ Update products
- ❌ Delete products
This is a strong base for VB.NET applications interacting securely with MySQL. 🛡️
Download the code and try it yourself!
♥ Here are some online Visual Basic lessons and courses:


No comments:
Post a Comment