Step-by-Step Guide to
Installing SQL Server 2000
Whether this is your first, second, or third time installing SQL Server 2000, following these steps will ensure proper registration and link the program correctly.
The screenshots (referenced as Images or Figures below) will guide you through every stage.
🍀Installing SQL Server
Launch the Installer
Open the SQL Server.exe file on your computer or laptop. This is the file used to create a new registration.
Select Components
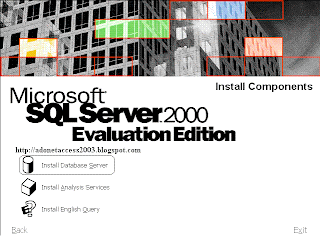
Choose SQL Server 2000 Components as the initial option. Then, when the next prompt appears (see Image 2), select Install Database Server to continue (refer to Image 3).
Welcome Screen
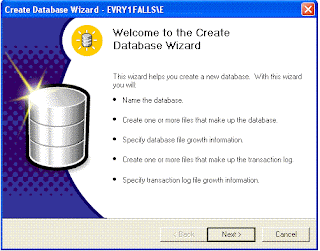
When the welcome screen appears (Image 3), click Next. On the following screen (Image 4), choose Local Computer to install the server on the current machine—as the Computer Name field is automatically filled (and grayed out) with your machine name. Then click Next.
Server Selection
On the screen similar to Figure 5, select the first option which creates a new sub-server with its own entity, and click Next.
User Registration
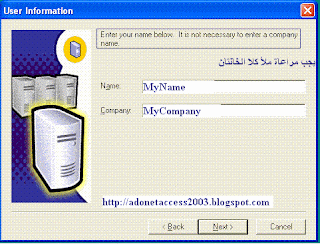
In the screen like Figure 6, fill in the required user information. Once complete, click Next. When the Terms of Use (Figure 7) appears—indicating a 120‑day trial for the Enterprise Edition—click OK.
Select Server and Client Tools
When prompted (Figure 8), choose to install both the Server and Client Tools on your current machine, then click Next.
Enter the Server Name
At the prompt (similar to Image 9), carefully type in your desired server name (for instance, “E”). Then click Next.
Server Properties
On the next screen (Figure 10), since the server will run on your current device, select Use Local System Account and click Next. Then, when prompted (Figure 11), enter your designated SA (System Admin) password and click Next.
File Copy Process
Continue by clicking Next on the application screen until all files are copied (as shown in Figures 12, 13, and 14).
Finish Installation
Once the components are installed, restart your device. On reboot, you should see the SQL Server2000 icon in the Windows toolbar (Figure 15).
Access SQL Manager
Double-click the SQL Server2000 icon to open the SQL Manager screen. Here, you can view all SQL servers running on your network. In our example (Figure 16), the server is labeled EVRY1FALLS—this denotes your registration. Subsequent installations may appear as New Registration if repeated.
Local Server Confirmation
Your server is now installed locally. When using Visual Studio 2005 , the steps and code will remain nearly identical to those used on a remote server.
Launch Enterprise Manager
From the Start Menu, open Program Files, select SQL Server2000, and then choose Enterprise Manager (see Figure 17).
Create a New Registration (if needed)
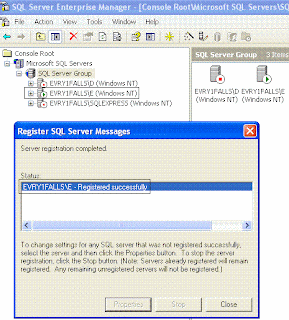
If the server or registration (as in registration “E”) isn’t visible, you can create a new registration: Right-click on SQL Server 2000 Group in Enterprise Manager (Figure 18) and select New Registration.
On the next screen, click Next after reviewing the explanation.
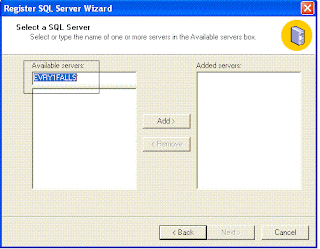
When the list of servers appears (Figure 19), click Add—or manually type the server name if it isn’t pre-listed (see Figure 20).
Click Next, then select the option to enter the SA password (as previously set, Figure 11), and click Next.
Continue through the prompts until you click Finish. A confirmation message should indicate the new registration has been successfully enabled (Figure 21).
Setting Up Visual Studio .NET 2005
-
Open Visual Studio: Launch Visual Studio and create a new project named
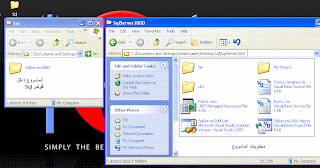
SqlServer2000. Click OK to confirm (refer to Figure 1) - Design Your Interface: Build an interface that includes a Name TextBox, a Date of Birth DateTimePicker, an Age TextBox, and buttons labeled New, Save, Search, Delete, Edit, Print, and Exit. Save the project in a folder named Sql on your Desktop (see Figures 2, 3, and 4).
3. Designing the Database
-
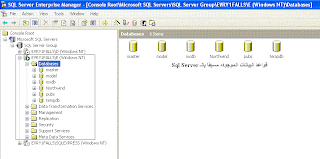
Create a New Database: Using Enterprise Manager from your prior SQL Server registration, set up a small database called Info to store registration data (name, date of birth, and age). Follow the guided steps with the wizard as illustrated in
- Figures 22 to 29.
-
Specify the Database Path: Ensure that the database path is correctly set in the Debug folder (inside the Bin folder of your Desktop project directory). Your database should appear in the proper location (as seen in Figures 30 and 31).
-
Create a Basic Table: Inside the Info database, create a table (refer to pictures 32 through 36). Once you finish editing (closing the table prompts in picture 34), verify that the table (named Basic) shows all required fields and that its owner is set to
dbo. You can modify permissions later if needed.


4. Connecting Your Application
Open your Visual Studio project and follow the connection steps (from steps 1 to 7). Remember that:
-
You need to use Visual Studio Enterprise (not the Evaluation version) for SQL Server to appear in image 5.
-
If the server name or registration isn’t visible, type it in manually, then enter the
sausername and the previously set password. -
In the final step, instead of completing the wizard with Next, copy the code shown in image 8 and click Cancel.
5. Integrating the Code
-
Open the form in your project, delete any existing code, and paste your new connection code.
-
Press
Ctrl+F5to run the program. If the setup is correct, a message box with(1)will appear, confirming a successful connection between your database and application. - Complete the remaining sections of your program as needed.
If you have any questions or encounter difficulties, please leave a comment below—I’ll be happy to assist
♥ Here are some online Visual Basic lessons and courses:

